
TB 9-6685-383-40
(10)Set the calibrator for 50 V 0.1 V and use the up and down arrows to enter the
measured full scale voltage. Press the ENTER key to accept the calibration. Press the
EXIT key four times to quit the CALIBRATION and SETUP modes.
(11)Verify the adjustment by repeating paragraph 8 a above.
9. Dc Current
a. Performance Check
(1) Press the INPUT button and, using the up and down arrows, scroll to
CURRENT. Press the ENTER key
.
(2) Connect the output of the calibrator to the mA in on the TI.
(3) Set the calibrator to the first value listed in the Calibrator Applied column of
table 4 and set OPR/STBY switch to OPR.
(4) TI will read within the limits in table 4. If not perform b below.
(5) Repeat technique of (3) and (4) above for remaining calibrator applied listed in
(6) Set TI power to OFF and disconnect the test setup.
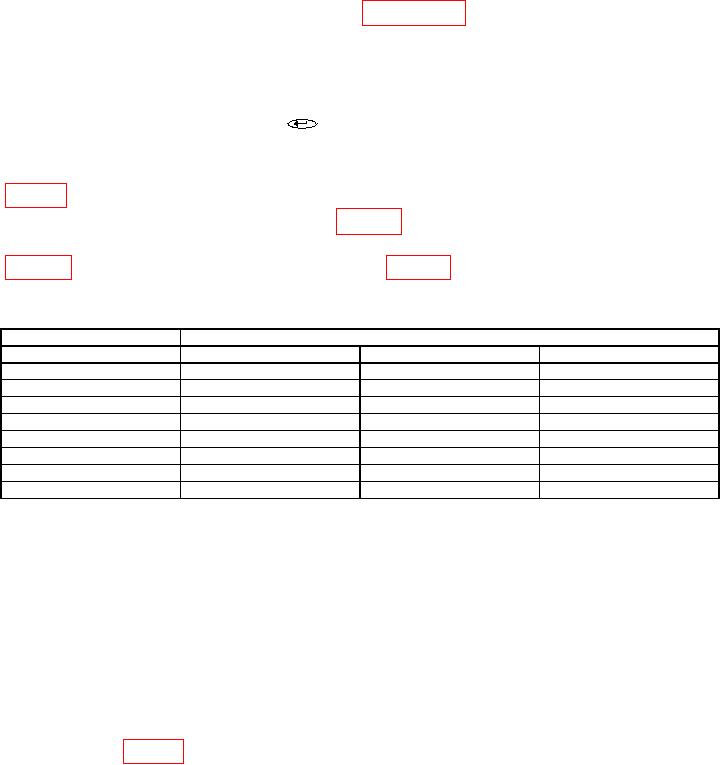
Table 4. DC Current Input.
Calibrator
TI
Applied (mA)
Range
Min
Max
-50
55
-50.027
-49.973
-25
55
-25.015
-24.985
-12.5
55
-12.508
-12.492
-5
55
-5.005
-4.995
5
55
4.995
5.005
12.5
55
12.492
12.508
25
55
24.985
25.015
45
55
49.973
50.027
(7) Connect the TI mA out connectors to the Multimeter Hi and LO Inputs,
observing polarity.
(8) Set the Multimeter for mA DC and Autorange.
(9) Set TI power to ON.
(10) Press TI Output button and use arrows to select mA Step, then press ENTER.
Select Linear 4 - 20 mA, press ENTER. Press F2 to turn on 24 volt supply, then press F1
to run the mA step routine.
(11)Monitor the Multimeter indication as the TI cycles from 4 to 20 mA, in 4 mA
steps. The Multimeter must indicate within the values listed in the Limits of the Min and
Max column of table 5 at each 4 mA step. If not perform b below.

