
TB 9-6625-133-40
(1) Set rear panel CALIBRATION switch to ENABLE (if necessary).
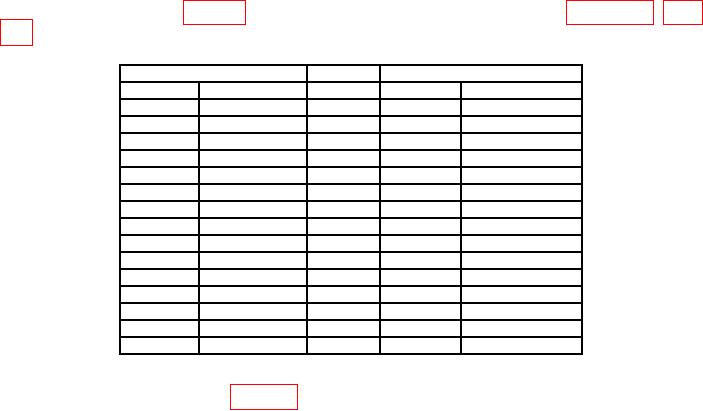
(2) Ensure that table 10 is populated with the values obtained in appendix A (table
A-2) for the ranges requiring adjustment.
Table 10. DC Voltage Adjustments.
TI
Nominal
Calibrator
Range (V)
Cal Point
(V)
Displayed True Applied (V)
200 m
Zero
Short
------
------
200 m
Range Gain +
100 m
------
200 m
Range Gain -
-100 m
------
2
Zero
Short
------
------
2
Range Gain +
1
------
2
Range Gain -
-1
------
20
Zero
Short
------
------
20
Range Gain +
10
20
Range Gain -
-10
200
Zero
Short
------
------
200
Range Gain +
100
200
Range Gain -
-100
1000
Zero
Short
------
------
1000
Range Gain +
1000
1000
Range Gain -
-1000
(3) Prepare TI for zero point adjustment by shorting leads to a low thermal binding
post such as that shown in figure 1. Use high quality low thermal emf leads. Allow
adequate time for thermals to dissipate.
(4) Press TI keys as listed in (a) through (c) below.
(a) CLEAR
(b) [PWR UP DFLT]
(c) DCV (if necessary)
(5) Press CAL to enter the CALIBRATION menu.
(6) Press DCV to display ranges in right display.
(7) Set TI to range requiring adjustment. Allow time for TI indication to settle.
(8) Press SAMPLE to initiate the adjustment. Zero point adjustment is complete
when the BUSY legend goes out.
(9) Repeat technique of (7) and (8) above for remaining TI ranges requiring adjustment.
(10) Disconnect shorted leads.
(11) Set TI to range requiring adjustment (press DCV to display ranges in right
display, if necessary).
(12) Apply characterized positive voltage to TI for the range that requires
adjustment. Allow time for TI indication to stabilize.
(13) Press CAL to enter the CALIBRATION menu.
(14) Press [SET] in the CALIBRATION menu.
(15) Enter the true applied positive value of the voltage using TI numeric keypad,
then press ENTER.
24